Dynamis - Windurst
From HomepointXI Wiki
Contents
Dynamis - Windurst
General Info
- Multiboxing is strictly forbidden in Dynamis. It can crash your client and/or bring the server down.
- Do not one-shot statues. NMs are spawned so pop items are not used. You must attack Statues in order to spawn the necessary NMs to complete Dynamis.
| Type | RoZ Dynamis - City |
|---|---|
| Entry | Trail Markings, Windurst Walls (C-12) |
| Requirements | Vial of Shrouded Sand (key item) |
| Initial Time Allotment | 60 minutes |
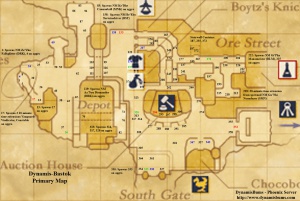
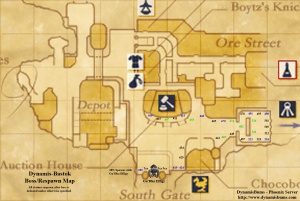
Maps
Time Extensions
| Extension | Time | Extension | Time |
|---|---|---|---|
| Manifest Icon 19 | 20 minutes | Manifest Icon 234 | 20 minutes |
| Manifest Icon 59 | 20 minutes | Manifest Icon 277 | 20 minutes |
| Manifest Icon 109 | 10 minutes | Manifest Icon 347 | 10 minutes |
| Manifest Icon 152 | 20 minutes | Tzee Xicu Idol (Zone Boss) | 30 minutes |
Total Extensions: 2 hours, 30 minutes
Strategy
Basic Strategy
- Clear statues in front of Mog House area to Auction House.
- Clear statues in front of Auction House.
- (Optional) Clear statues to Windurst Woods zone.
- Clear statues to Shantoto's Manor.
- Clear statues to Jeuno Consulate, including NM Wuu Qoho the Razorclaw. Use the area in front of Shantoto's manor to fight and the path further southwest to kite statues.
Route A (Counterclockwise, for larger groups):
- Clear statues to Zonpa Zippa's Manor.
- Clear statues to Toraimarai Canal gate. Statues will spawn underneath the bridge area by aggro of Avatar Icon 234.
- Clear statues to House of the Hero, including NM Haa Pevi the Stentorian.
- Clear statues to Yoran-Oran's Manor, including NM Xoo Kaza the Solemn.
- Clear statues at Koru-Moru's Manor.
- Clear statues on the bridge to Heaven's Tower.
- Clear statues south of the bridge to Heaven's Tower
- Pull NM Loo Hepe the Eyepiercer from statue at Heaven's Tower entrance. Avatar Icon 337 will spawn Avatar Icons 315, 317, and 319 at the base of the bridge to Heaven's Tower, which may make a sacrifice pull necessary. Alternatively, groups can camp at the Heaven's Tower itself and pull the NM normally.
Route B (Clockwise, for smaller groups):
- Return southwest, clearing statues towards the bridge to Heaven's Tower.
- After obtaining the time extension from Manifest Icon 277, groups will avoid statues at Koru-Moru's Manor by following the edge of the path closest to the center, towards Yoran-Oran's Manor.
- Clear statues to Yoran-Oran's Manor, including NM Xoo Kaza the Solemn.
- Clear statues to House of the Hero, including NM Haa Pevi the Stentorian.
- Clear statues to Toraimarai Canal gate. Statues will spawn underneath the bridge area by aggro of Avatar Icon 234.
- (Optional) Clear statues to Zonpa Zippa's Manor.
- Return southwest to the bridge leading to Heaven's Tower.
- Clear statues on the bridge to Heaven's Tower.
- Pull NM Loo Hepe the Eyepiercer from statue at Heaven's Tower entrance. Avatar Icon 337 will spawn Avatar Icons 315, 317, and 319 at the base of the bridge to Heaven's Tower, which may make a sacrifice pull necessary. Alternatively, groups can camp at the Heaven's Tower itself and pull the NM normally.
Boss Strategy
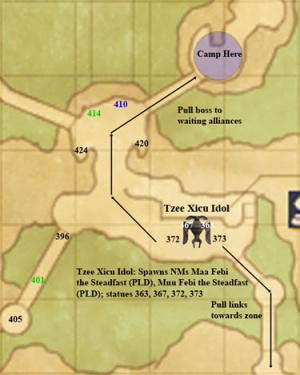
- Camp northeast of the bridge directly north from the Auction House.
- A player with increased movement speed aggros (does not pull) and draws away spawned statues, Vanguard, and NMs from Tzee Xicu Idol while another player pulls Tzee Xicu Idol itself from the group back to the waiting alliances.
- It is possible for the player training away the remaining enemies to drop his hourglass to avoid being KO'd.
- Defeat Tzee Xicu Idol.
Defeating Tzee Xicu Idol grants a 30-minute time extension.
General Advice
- Vanguard's Crows cast Silencega often. Crows should be Slept and and Silenced away from the main alliances while fighting other Vanguard.
- Clearing the House of the Hero:
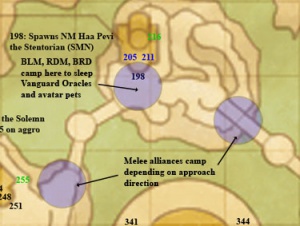
- To avoid Astral Flow, alliances are split up between meleers that will kill each Vanguard Oracle and the mages that will keep the remaining Oracles and their avatar pets asleep.
- A puller (PLD or WAR) will choose a Vanguard Oracle to bring back to the alliances. Another mage will cast some DoT on it (eg., Dia) to prevent it from being slept again. If the puller engages their target, the mage can easily /assist to quickly find the target in the group and DoT it appropriately.
- The process is repeated until all the Vanguard have been cleared.
- It is important that the melee alliances keep their distance from the mages sleeping the remaining Vanguard, as AoE (eg., Sweep) can cause mages to die or be otherwise incapacitated, possibly preventing an avatar's Astral Flow from being stopped once sleep wears off.
- Map and notes for Koru-Moru's Manor here.
Zone Item Drops
Relic Weapons
- Ito (SAM)
- Relic Axe (BST)
- Relic Blade (DRK/PLD/WAR)
- Relic Scythe (DRK)
Artifact Armor
- Melee Gaiters (MNK Feet)
- Sorcerer's Tonban (BLM Legs)
- Duelist's Gloves (RDM Hands)
- Assassin's Vest (THF Body)
- Valor Coronet (PLD Head)
- Abyss Sollerets (DRK Feet)
- Monster Jackcoat (BST Body)
- Bard's Cuffs (BRD Hands)
- Saotome Kote (SAM Hands)
- Wyrm Brais (DRG Legs)
- Summoner's Bracers (SMN Hands)
- Mirage Shalwar (BLU Legs)
- Commodore Bottes (COR Feet)
- Etoile Tiara (DNC Head)
- Argute Pants (SCH Legs)
Currency
- One Byne Bill
- One Hundred Byne Bill
General & Synthesis Items
- Fresh Orc Liver
- Griffon Hide
- Giant Frozen Head
- Gold Beastcoin
- Infinity Core
- Mythril Beastcoin
- Sparkling Stone
Beastiary
Notorious Monsters
| Name | Job(s) | Spawn Location | Notes |
|---|---|---|---|
| Aa'Nyu Dismantler | DRK | Adamantking Effigy 119 | Defeat required to spawn Gu'Dha Effigy (?) |
| Be'Ebo Tortoisedriver | MNK | Bastok Markets zone | Defeat required to spawn Gu'Dha Effigy |
| Gi'Pha Manameister | BLM | Alchemy Guild | Defeat required to spawn Gu'Dha Effigy |
| Gu'Nhi Noondozer | SMN | South of Alchemy Guild | 30-minute time extension when defeated |
| Ze'Vho Fallsplitter | DRK | Zeruhn Mines Zone | Defeat required to spawn Gu'Dha Effigy |
| Gu'Dha Effigy | n/a | South Gate | Zone Boss, 30-minute time extension |
General
| Quadav (Vanguard) | WAR | MNK | THF | WHM | BLM | RDM | PLD | DRK |
| Vindicator | Militant | Purloiner | Constable | Thaumaturge | Protector | Defender | Vigilante | |
| BST | BST's pet | BRD | RNG | SAM | NIN | DRG | SMN | |
| Beasttender | Scorpion | Minstrel | Mason | Hamamoto | Kusa | Drakekeeper | Undertaker |
Abilities
Quadav
- Head Butt - ST Damage, Stun
- Howl - Warcry
- Shell Bash - ST Damage, Stun
- Shell Guard - Defense Boost
- Ore Toss - ST Damage
- Wrath of Gu'Dha - AoE Damage, Gravity, knockback (NMs and Effigy Shields only)
Targeting Order
- SMN > BLM > BST > BST's Pet
- WAR = THF = RDM = PLD = DRK = BRD = RNG = SAM = DRK > MNK
- WHM > NIN


