Difference between revisions of "User:Epictaru/Sandbox/FFXI HD Graphics Guide"
(Created page with "Note from Epictaru: This is a shameless copy of a guide written for a different private server that I helped create, the primary creator of this guide is a player by the name...") |
m (→Step 3) |
||
| Line 117: | Line 117: | ||
=Step 3= | =Step 3= | ||
| − | *Before | + | *Before installing Reshade, it is recommended to install dgVodoo2. It provides d3d9.dll and various other video card tweaks. |
| − | |||
== dgVodoo2 == | == dgVodoo2 == | ||
| − | *'''[[DGVoodoo2|Follow this link to go to the DGVoodoo2 page on this wiki. Don't forget to return here after you've installed | + | *'''[[DGVoodoo2|Follow this link to go to the DGVoodoo2 page on this wiki. Don't forget to return here after you've installed dgVoodoo2!!!]]''' |
| + | =Step 4= | ||
| + | |||
| + | == Reshade == | ||
| − | * | + | *The download link for Reshade is: https://reshade.me/ |
| + | |||
| + | *Download it and select where to point the wrapper/shader. You will also be able to choose shaders packs I personally just select them all..Also links below show install process and where to point the program for each individual launcher..they are a little outdated as I select the "Direct3d 10/11/12" as Direct3d 8 is not in the package anymore for reshade.. | ||
*Heres a pic of my settings to if you wanna use them as reference Also make sure you opening Dgvoodoo as admin!! big cache here!! | *Heres a pic of my settings to if you wanna use them as reference Also make sure you opening Dgvoodoo as admin!! big cache here!! | ||
Revision as of 14:51, 4 October 2022
Note from Epictaru: This is a shameless copy of a guide written for a different private server that I helped create, the primary creator of this guide is a player by the name of Hedron on the different private server.
So you wanna play FFXI in that sweet sweet HD beauty?? Below is small compilation of the process. This is NOT recommended for hard drive users as long zone load times can lead to disconnects and other issues. Also, you need somewhat of a modern PC set up (aka no potato PCs!)
- NOTE: You, and you alone, are responsible for issues that may occur from the following of this guide. HomepointXI bears zero responsibility!
Contents
Step 1
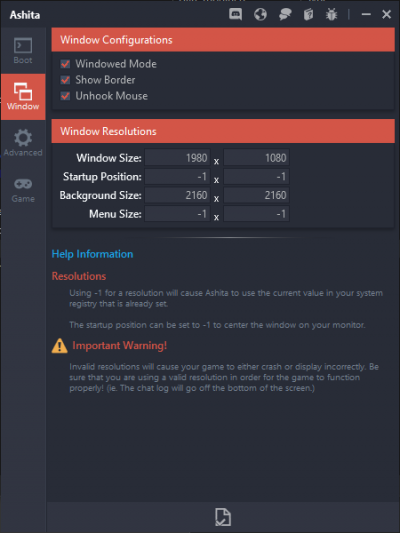
Ashita
Using a value of -1 for any of these will default to whatever is set in your Windows Registry (i.e., whatever is set in the FFXI Config program).
- Window Size: This varies on your supported monitor/video card resolutions, most people usually select your native monitor resolution.
- Startup Position: defines where on your monitor you want your game window to be positioned. Obviously, if you don't have a checkmark in the Windowed Mode box, this won't matter.
- The x-value and y-value you define here is used for where the top-left corner pixel of your game window will be positioned on your monitor.
- As there is no way to "define" what monitor you want to have a game window placed on, you would need to add the x-value/y-value of your primary monitor to be able to effectively offset the position of the game window on a different monitor in your setup.
- Background Size: This needs to be a multiple of either the x-value (horizontal) or the y-value (vertical) of your Window Size resolution, in powers of 2..
- By this I mean it should be x2 or x4 or x6 or x8, etc. etc. etc.....
- A value of double (x2) of your Window Size means that you are super-sampling your background resolution...
- A value of quadruple (x4) of your Window Size means that you are super-duper-sampling your background resolution...
- A value of sextuple (x6) of your Window Size means that you are super-duper-sexy-sampling your background resolution...
- A value of octuple (x8) of your Window Size means that you are just crazy, you're going to rip a hole in the space-time continuum, and your video card and your monitor will probably spontaneously combust due to all of the pixels being used to display this level of super-duper-quaduper-sexdooper-STUUUUUUUPOR background resolution.....but YOLO!!!!!!
- You would use this resultant value for both the x and y resolutions (in Ashita, the first box is the x-value and the second box is the y-value) as the background in FFXI is actually just a bunch of tiled squares.
- Disclaimer (again): You, and you alone, are responsible for issues that may occur from the following of this guide. HomepointXI bears zero responsibility!
- Menu Size: This can be set for whatever works for you to be able to easily see the menus in game. Remember that the higher of a resolution size you choose for Menu Size, the smaller the menus in game will appear... (this is the same as UI Scale in Windower)
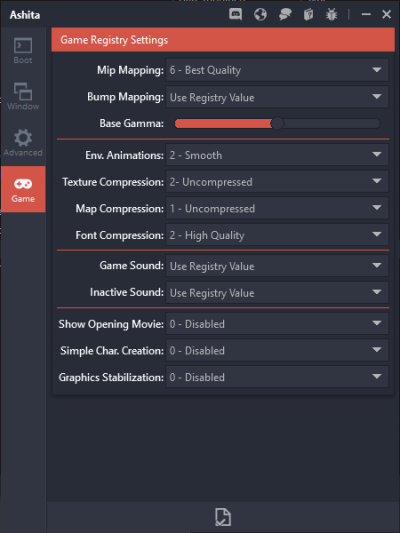
Game settings
- Mip Mapping: 6-Best Quality
- Bump Mapping: Disabled
- Base Gamma slider: Up to you. This adjusts in game brightness.
- Env.Animations: Smooth
- Texture Compression: Uncompressed
- Font Compression: High Quality
- This one can be weird and just depends on the user or the fonts you use. It can be High Quality or Uncompressed.
- Note: This will not increase your font size, that is handled by the Menu Size setting in the previous section.
- Game Sound: Up to you. (this is the same as Sound in Windower)
- Inactive Sound: Up to you, this determines if you want to still hear game sounds when the game window isn't the top window in focus on your monitor. (this is the same as Always Play Sound in Windower)
- Show opening movie: Disabled (unless you like watching it every time you load the game)
- Simple Char. Creation: Up to you. This removes animated characters during creation, only shows changes to head models.
- Graphics Stabilization: Disabled.
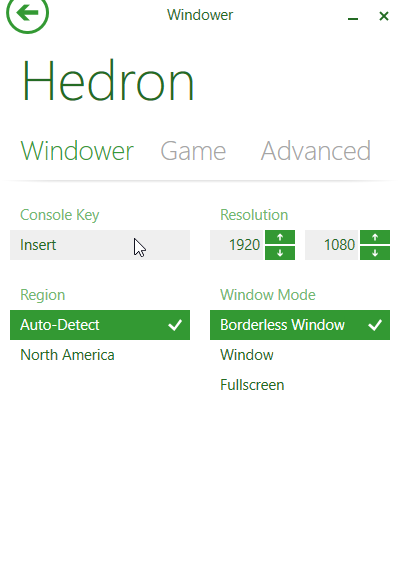
Windower!
- Resolution: This varies on your supported monitor/video card resolutions, most people usually select your native monitor resolution.
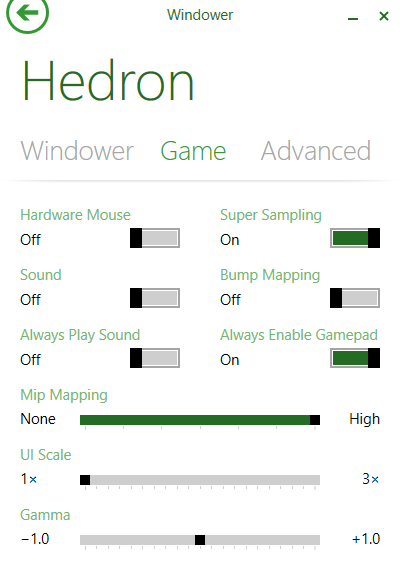
Game settings Tab
- {{FS|4|Hardware Mouse</big>: OFF (one downfall of using dgvoodoo2 is that you can't turn the mouse off)
- Sound: Up to you. (this is the same as Game Sound in Ashita)
- Always Play Sound: Up to you. (this is the same as the Inactive Sound setting in Ashita)
- Super Sampling: ON (This works similar to Ashita's doubling (x2) of your Background Size. You unfortunately can't go higher than Super Sampling with Windower)
- Bump Mapping: OFF (This is simply FFXI's version of a shader overlay but it doesn't help or work well. We'll address better ways in later sections of this guide).
- Always Enable Gamepad: If you don't use a gamepad/controller, set this to ON. Set it to OFF if you don't.
- Mip Mapping slider: High (**You can also set it on Low and use dgVodoo2's settings for anti-aliasing and texture filtering to get even higher levels of detail, etc. (dgVoodoo2 is covered later in the guide)
- UI Scale slider: This can be set for whatever works for you to be able to easily see the menus in game. Remember that the higher of a resolution size you choose for UI Scale, the smaller the menus in game will appear... (this is the same as Menu Size in Ashita)
- Gamma slider: Up to you. This adjusts in game brightness.
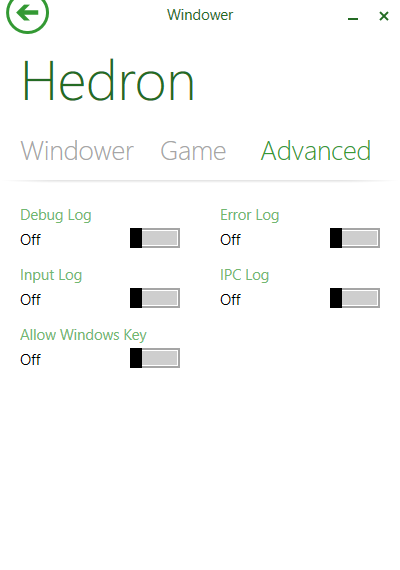
Advanced Tab
- I usually do not mess with this page.
- Disclaimer (again): You, and you alone, are responsible for issues that may occur from the following of this guide. HomepointXI bears zero responsibility!
Step 2
HD Textures!
To use any of these, you can either back up your original Dats and just straight overwrite your Dats inside the FFXI folder. The other option is to use the Dats plugin or the XIPivot plugin
- HD Overhaul by Amellia
- Listed below are the upscale packs. They covers almost all the zones in FFXI.
- Ashenbubs HD textures
Step 3
- Before installing Reshade, it is recommended to install dgVodoo2. It provides d3d9.dll and various other video card tweaks.
dgVodoo2
Step 4
Reshade
- The download link for Reshade is: https://reshade.me/
- Download it and select where to point the wrapper/shader. You will also be able to choose shaders packs I personally just select them all..Also links below show install process and where to point the program for each individual launcher..they are a little outdated as I select the "Direct3d 10/11/12" as Direct3d 8 is not in the package anymore for reshade..
- Heres a pic of my settings to if you wanna use them as reference Also make sure you opening Dgvoodoo as admin!! big cache here!!
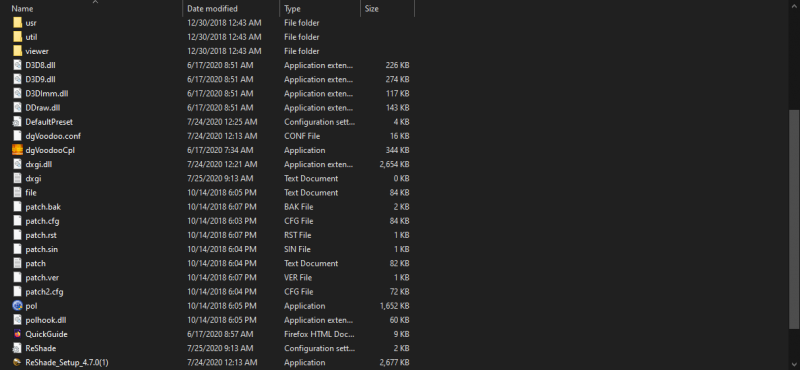
- NOTE:Make sure you open as admin and also extract dgvoodoo into your playonline folder.
- Note: I usually ignore the first tab..
- NOTE:MAKE SURE YOUR FOLDER PATH IS CORRECT..its also shown in the video above.. You can run your ffxi to find the path if needed it should show up..
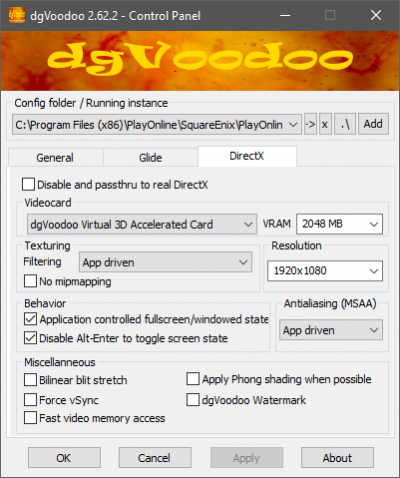
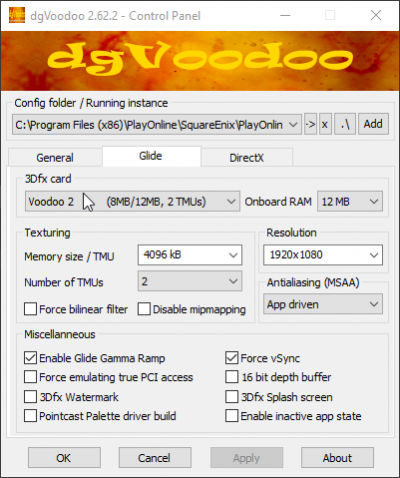
Below is example of what the path should look like..
- Settings tab 3
- Settings tab 2
- NOTE: the first time your using Dgvodoo2 make sure you leave watermark on so you can tell if its pointed correctly.
Step 4
Reshade!
- Below is the install link..
- Use amelias links for Windower or Ashita install process its out of date so some items might look diff but it has the correct directory paths for ashita and windower..
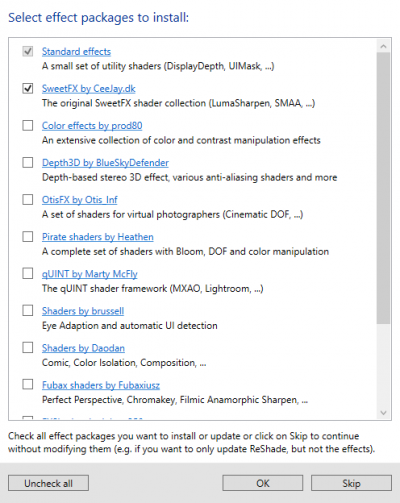
- Select all the shader presets that come up couple pages of them I recommend just downloading them all..
- Once installed it will say if it installed successfully!
- Next in game you will see this.. at the top of your screen ignore it and just fully log in..
- Note pics little different it will have a tutorial for you..
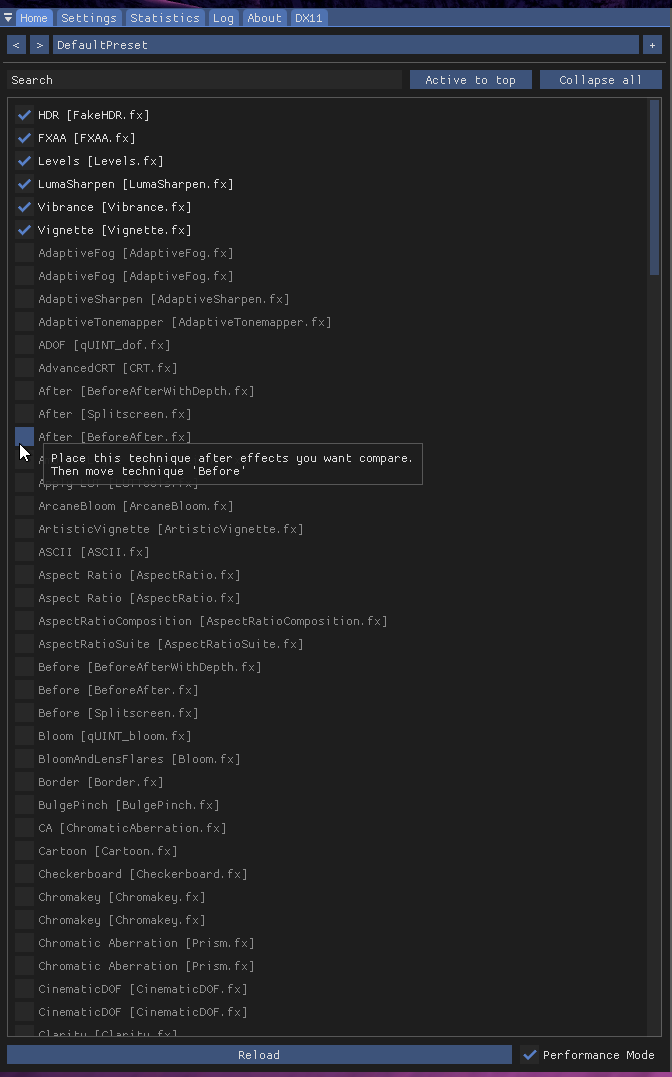
- Now that your in game hit home on your Keyboard and follow on screen tutorial
- Once done with tutorial select and play with shader presets.. you can't go wrong here select what you like..
- NOTE:These are my preferred shaders..
- Then after shaders you prefer are selected hit active to top and select performance mode..
- Next go to the settings section and pick a shader off Key I usually use scroll lock but up to you..
- After all this you should be all set and running in that Sweet FFXI HD!!..
References
- ALSO YOURE VIEWER DISCORD CAN USALLY HELP FIELD QUESTIONS IE WINDOWER DISCORD OR ASHITA DISCORD.
- Heres also some other HD links..
- Also run down of ingame graphics and other peoples work..
- I recommend setting your draw distance higher if your pc can handle it and your fps to at least 60 fps..
NOTE: THIS CAN CAUSE CUT SCENE ISSUES!!
- Each viewer does it differently:
- Windower: Type //FrameRateDivisor 1-3 (Caps are needed!) 1 is 60; FPS 2 Is 30; 3 is Uncapped (I think you can always install the config plugin and do //config in game)
- Ashita: I think its /fps then 0-2 simulair to Windower.. 0 Uncapps Fps; 1 is 30; 2 is 60
- And using Xicamera for Camera unhitching...
- Other work.. mostly for retail but has usefull info!
- https://www.bg-wiki.com/bg/User:Sitara/GraphicsEnhancement is also very usefull..
